


Remote Teaching Resources
Preparing to Teach Remotely
To assist in transitioning courses from face-to-face to the online teaching environment, we would like to provide some strategies and resources. The eLearning Team is here to support you in any way we can to help ensure your success. If you need to contact eLearning staff, please email elearning@utdallas.edu.
1. Get Training
eLearning offers training on eLearning and related topics. To learn more about our training and to sign up, please visit our training webpage.
2. Set up your technology
Make sure your computer is kept up to date and use an eLearning supported browser. You can check your browser here.
- If you have technical issues with eLearning, you can contact the 24/7 eLearning Help Desk at: https://ets.utdallas.edu/elearning/helpdesk or 1-866-588-3192.
- To contact eLearning staff for assistance, please email: elearning@utdallas.edu.
If you have technical issues that are not eLearning related (computer problems, NetID/password issues, etc.), please contact the OIT Help Desk:
- OIT Help Desk provides technical assistance with problems on UT Dallas Net ID accounts
- Email Support (assist@utdallas.edu)
- Phone Support (972-883-2911)
- Live Web Support are all available
Please check the business hours and other information at OIT Help Desk website.
Microsoft Teams and Stream are the tools available for live class session delivery and for session recordings for asynchronous access.
3. Access your eLearning course
Log on to eLearning (using your NetID and Password) at https://elearning.utdallas.edu. You will see a course shell for each section you teach.
4. Communicate with your students
- Maintain regular communication with your class.
- Establish a preferred method of communication as well as a policy for turnaround time on responses from you. Responding within three working days is recommended. This information should be in your course syllabus.
- Use eLearning course communication tools such as: Announcements, Email, Discussion Board and Blackboard Collaborate web conferencing. See the eLearning Tutorials page for getting started videos.
5. Post an updated syllabus
- Post your syllabus in the eLearning course and also on CourseBook.
- See the Syllabus Template page for the most current versions.
6. Deliver course materials
- Synchronous delivery: You can use the Microsoft Teams tool to host a live class session. You can also record the session for students to view later.
- Asynchronous delivery: You can record a Teams session or use Stream to record and post your lectures. Additionally, you can record and edit lectures using Camtasia Studio and upload them to Stream. Other options include uploading lecture notes and handouts created in Word, PDF, or PowerPoint (which can be narrated) to the eLearning course.
7. Conduct class activities and assessments online
- Use the Discussion Board, Group tool, and Blackboard Collaborate web conferencing tool for interactive discussions and presentations.
- Set up assignments for online submission of documents. You can grade submissions online and provide feedback to students.
- Conduct online exams. These can be graded online and students can view the results and scores.
- Use the Grade Center to manage grades and release them to students.
- See the eLearning Tutorials page on how to use each of these tools.
Best Practices and Resources
Online Teaching Handbook
Online Course Development Documents
Online Course Development Documents
Tips for Engaging Students Online
(Credit: The University of North Texas)
- Communicate Regularly and Often
Use the Announcements tool to communicate regularly with your students- Reminders for upcoming events
- Supplemental resources for course content
- Current events that connect with course content
- Clarification on content where students may be struggling
- Course success tips (i.e. best ways to prepare for upcoming tests)
- Make Expectations Clear
- Establish a communication plan with your students. Let them know what to expect from you each week and what you expect from them. For example:
- Assignments/Discussions
Provide guidance what’s expected from students for each task given. For example:- Assignments – Attach a document that contains detailed information on what you expect students to include in their submission.
- Discussion Boards – Include in the discussion board forum some guidance on where you want the discussion to go. How have you seen this in your own personal experience? Have you seen current events that relate to this topic? How would you handle this type of situation?
- Ensure Ease of Navigation
Keep your course navigation simple. Create separate folders for each type of content — i.e. Assignments, Exams, and Recorded Lectures. This way students don’t have to scroll through a long list of different materials to find what’s needed. - Practice Seeing Things from the Student Perspective
Use the Student View tool regularly after you’ve added content to ensure it looks as you expected. The Student View tool is also helpful in troubleshooting issues students may experience. - Hold Virtual Office Hours
Blackboard Collaborate is UTD’s supported web conferencing tool. Every eLearning course has a Blackboard Collaborate link in the course menu. You can schedule regular weekly times you are available just like you would face-to-face, and students can drop in as needed. - Expand Your Lectures
In addition to uploading your PowerPoint presentations, you can use Blackboard Collaborate to hold synchronous class Q&A sessions. You can also use Blackboard Collaborate to record lectures while you’re in the session by yourself. (Enter your Course Room, load materials, start your recording, and when done, your students can view the recording.) - Prepare to Convert the Group Works/Presentations Online
Use Group tool to set up groups within the course and enable tools under group setting to facilitate group communication and collaboration. Group presentations can be done via live Collaborate web conferencing or asynchronously via Discussion Board. - Be Willing to Adapt Based on Student Feedback
Encourage students to contact you if/when they have questions, and when needed, be willing to adapt your content to meet their needs. For example, if you have multiple students contacting you or posting on the discussion board that they don’t understand a certain topic, consider creating an additional short video specifically covering that area of confusion.
Best Practices For Setting Up Online Exams
- Randomization Randomize questions using Question Sets and/or choose the Randomize Questions in the Test Settings.
- Limit exam duration Be sure to set an appropriate test duration. For example, if you have a 30-question exam that most students can complete within 1-hour, don’t give students an hour.
- Present questions one at a time Instead of presenting all questions on one page, consider presenting questions one at a time (using prevent back-tracking option if needed).
- Limit the test result release options Consider only releasing the options necessary and only after all students have completed the exam.
- Using more higher-level thinking questions Instead of using simple factual answer questions, design questions to prompt students to apply concepts to new scenarios.
- Set up short quizzes Instead of high stakes exams, use more frequent short quizzes to keep students engaged.
- Design alternative assessment format Online exams are NOT the only way to assess students’ learning. Consider using different assessment format or activities. Design thought-provoking and creative assessments to encourage students comes up with their own topic and explore their own interests.
- Check for publisher’s test bank If you have adopted a publisher’s textbook for the course, you may check to see if a test bank is available which can be imported into your eLearning (Blackboard) course.
- Guidelines from Blackboard for setting up online exams with large enrollments.
- Force Completion (Not Recommended)
Keeping Your Collaborate Session Secure
In light of recent news reports from other universities reporting uninvited participants entering web conferences and causing disruptions, we’re providing some helpful guidelines to keep in mind when setting up your session and when conducting your Blackboard Collaborate session.
1. Limit Access To Session Guest Link
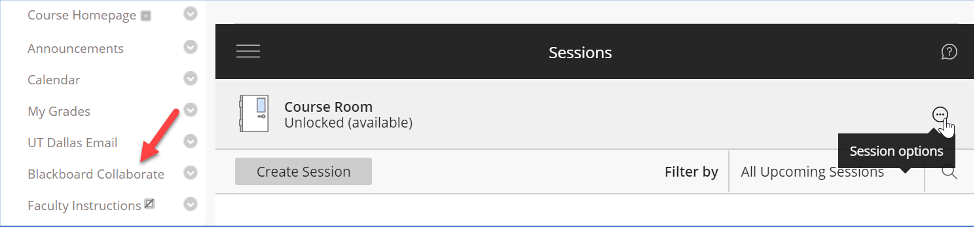
Blackboard Collaborate gives you, the instructor, the ability to create a Guest Link. You can use this link to share with a guest speaker, for example. Another scenario when you’d share the Guest Link is if you want to create one session specifically for Office Hours for all your courses. You can create the session in (for example) your section 001, and then you can share the guest link with your 002 and 501 sections.
To access the guest link, click on the Blackboard Collaborate link in the course menu. Then click the Session Options button for the session.
You’re then able to click the option to Copy Guest Link.
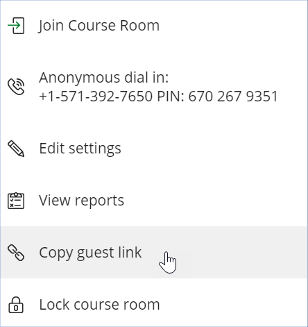
Now that you’ve copied that Guest Link, be sure to only share that link with those who will need it to access your session (i.e. a guest speaker or students in your course). DO NOT share the link in other public areas (i.e. Facebook, Twitter) where people who are not in your course will have access.
2. Restrict Access To Microphone/Webcam In Session Settings
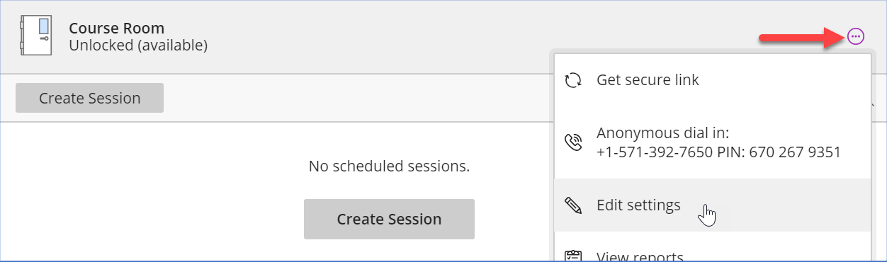
Before the session starts, you have the ability to edit the session settings and restrict Participant access to the microphone and webcam. To do this, click the Session Options button, then choose Edit Settings.
Scroll down to the Participants can: section, and select what access you want to allow for Participants.
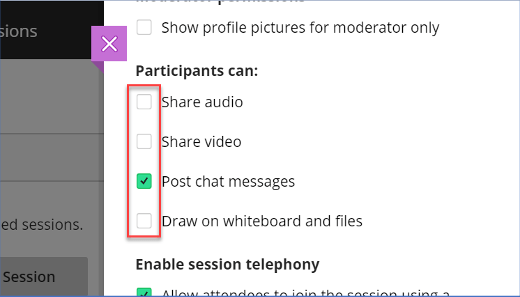
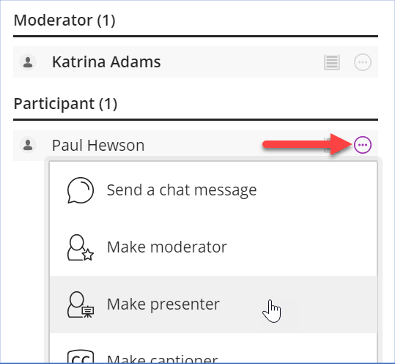
We recommend faculty use the settings seen in the screenshot above – participant access to share audio (microphone), share video (webcam), and draw on the whiteboard and files is turned off. The instructor, however, can easily give a Participant access during the session to these tools if/when needed by switching a Participant to a Presenter in the Participant List.
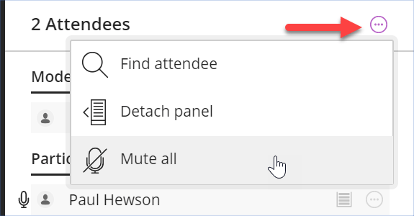
3. Quickly Mute All Participants
Once the session has started, if the instructor needs to mute everyone in the room, this can be done easily from the Participant List. Click the More Options button at the top of the Participant List, then choose Mute All.
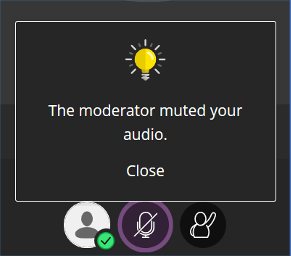
The Participant then sees that they’ve been muted by the moderator.
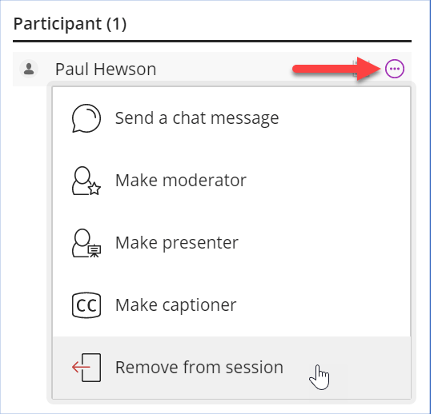
4. Remove A Participant From The Session
The Moderator can also, if needed, remove any participant from the session. To do this, go to the Participant List. Find the Participant that needs to be removed. Click the Attendee Controls button for that person, then choose the option to Remove from session.
Keeping Your Microsoft Teams Sessions Secure
Quick Guide for Secure Online Meetings